A few years ago I read an article about the dangers of burning candles. After I was done reading I gave my candles the stink eye and asked them why they were trying to kill me! I switched over to essential oils, but a part of me really missed burning my candles. I am so that person that soaks in a bubble bath with candles as my only source of light.
So back to the internet I went. There had to be a way to burn toxic free candles!
Turns out the only way to be 100% sure was to make them myself. And once I found out how easy and cheap they were to DIY I couldn't believe I hadn't been doing it all along.
Soy is the way to go! Soy is a natural, renewable source. Soy burnings longer and is biodegradable.
What you need
Soy wax flakes
Wicks (choose a size according to your jar)
Jars
essential oils
All of these can be found online at Walmart or amazon
Step 1:
Add your soy flakes to a glass jar of your choosing. You will be burning your candle in this jar so pick something you like!
Step 2:
Fill a pot with water and place your soy flake filled glass jars inside. You do not want the water to get inside the jar.
Note you will need to add more wax after it begins to melt. I add another 2 or 3 tablespoons to each. You need to be the judge and determine how high you want our wax to be. I used a rolled up piece of paper so I can control where the wax flakes go.
Also you will have to mix a bit as the flakes melt. I used a popsicle stick.
Step 3:
After all the wax is melted I remove them from the pot.
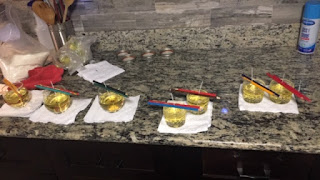
The jars are very hot. I use hotdog prongs to get them. Move slowly, you don't want wax everywhere. Put the jar on a flat surface that can handle heat. I also put a paper towel under mine just in case I spill some wax.
Step 4:
Add whatever essential oil you want. These candles are not very strong smelling, so I would say a minimum of 100 drops. If it is a stronger oil you could use less. Use your popsicle stick to stir the oil and the wax
Step 5:
Time for the wicks. You need to center them! This is so important or you will have uneven burning that may ruin your candle. I use pencils and tape to center mine
Let them set. Time varies, if my house is really warm it might take 3 hours. If the house is cooler they can set in 2.
Step 6:
Trim your wick and enjoy!


